This guide shows each step of the manual training loop. To automate the full loop from your live traffic, see AutoTrainer.
Start the demo project
If you already created the demo project during Run Your First Eval, you’re all set — open it from the dashboard and skip to the next section. Otherwise:- From the dashboard, navigate to the Learn page (or the Create a Project page).
- Find Customer Support Chatbot and click Start with demo project.
Train a model
1
Create a new training job
Open the Training tab in your project and click New Training Job.Select the three inputs from your demo project:
- Training dataset —
customer-support-train - Eval dataset —
customer-support-eval - Rubric — the customer support rubric
2
Choose a recipe
Next, pick a recipe — a pre-configured training setup with a base model, optimized parameters, and compute config. For this demo, the smallest recipe works well and will finish the fastest.
3
Launch training
Review your selections and click Start Training. The job will begin shortly.
4
Monitor training progress
During training, the platform periodically runs the 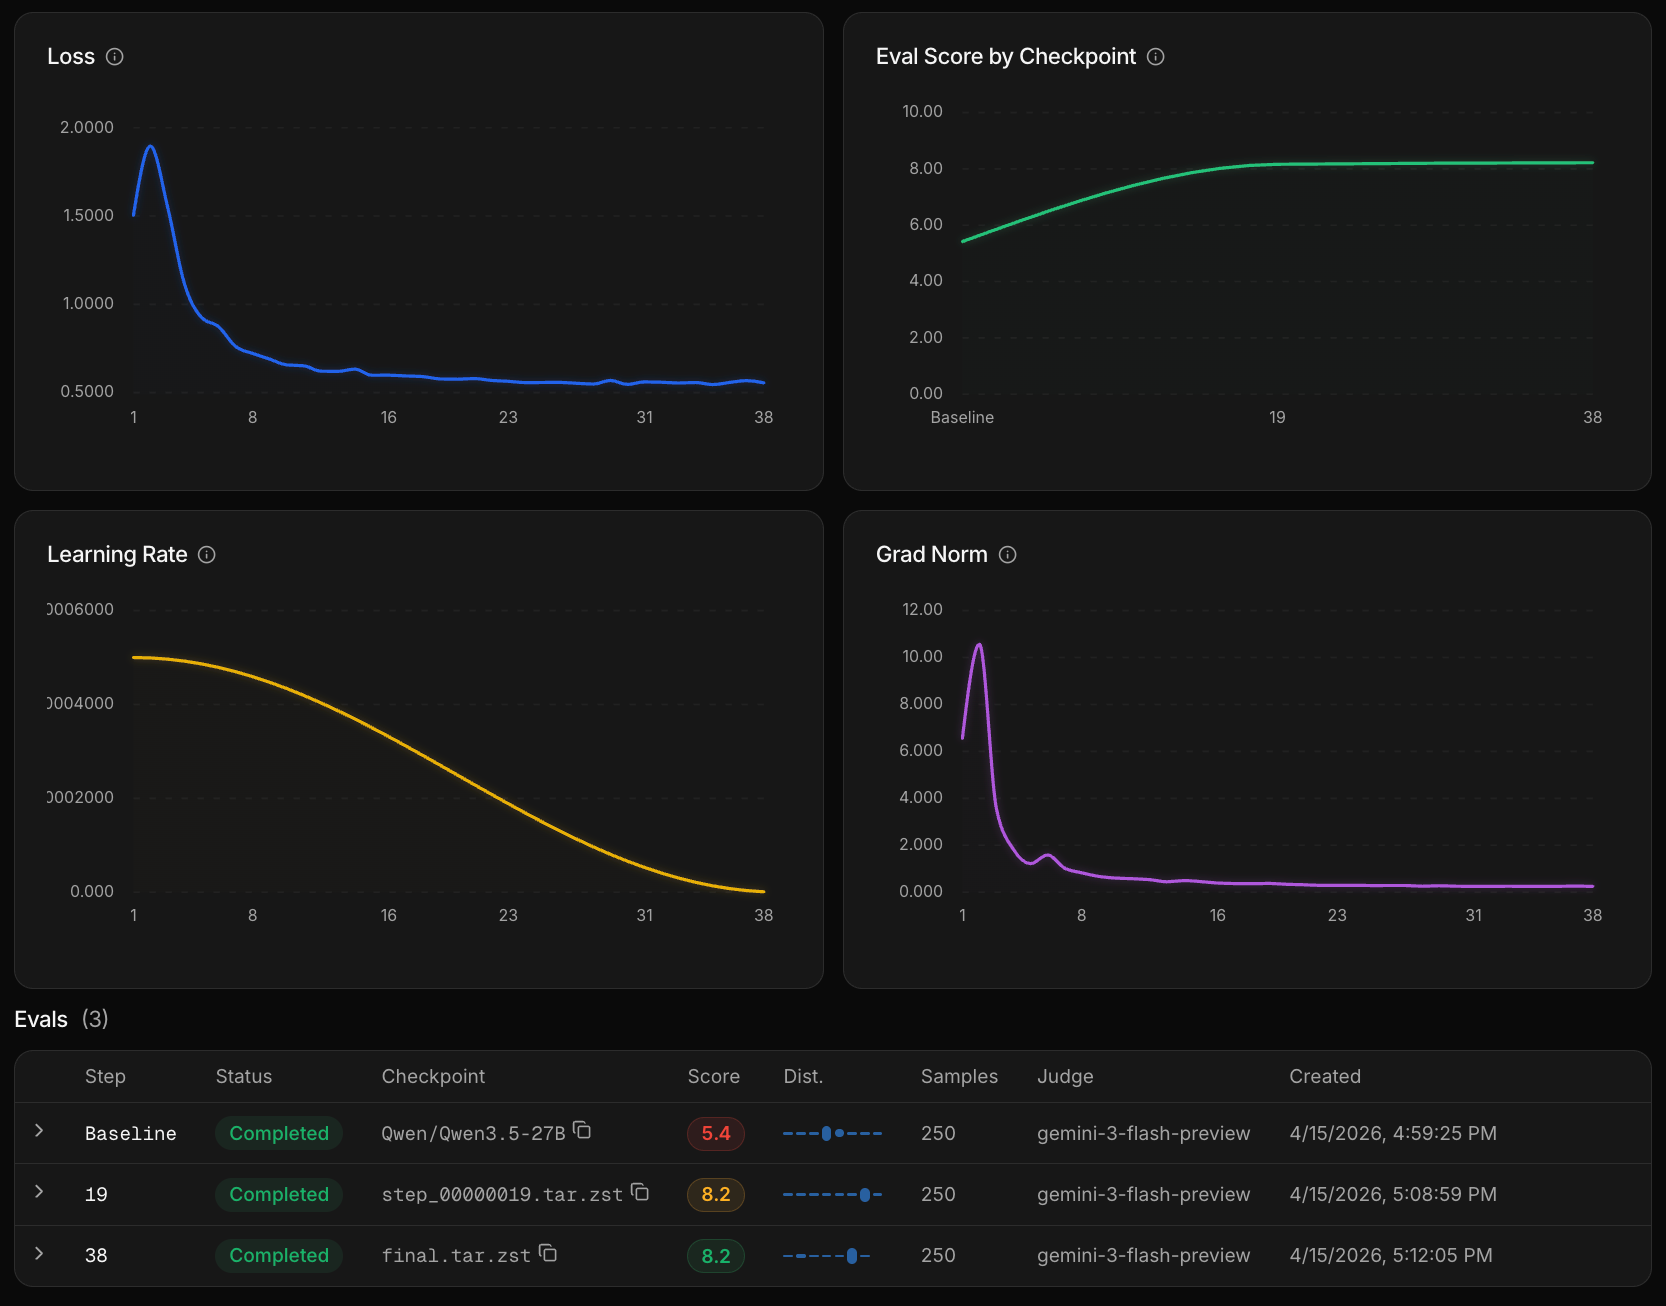
customer-support-eval dataset through your model-in-progress and scores the outputs using the rubric. You can watch these mid-training eval scores update in real time.- Scores improving — training is on track and continues
- Scores degrading — training stops early to prevent overfitting
Deploy the trained model
1
Deploy
When training completes, your model is automatically registered and ready to deploy. Navigate to Deployments, name your deployment, and click Deploy. The GPU spins up in a few minutes depending on model size.
2
Call your model
Once deployed, you call it the same way you’d call any model through the Inference API — same base URL, same headers — just swap the Replace
model parameter to your trained model’s identifier.your-org/your-trained-model with the model identifier shown on your deployment page. See Call Your Deployment for the full setup guide.Evaluate the trained model
Once a model has finished training, you can run evals against it alongside any other model — no deployment required. This lets you iterate on your data and retrain for better results before you deploy and take it to production.1
Run an eval with your trained model
Go to the Evals tab and create a new eval. Select the
customer-support-eval dataset and the project rubric — the same ones used during training. This time, add your trained model alongside one or more off-the-shelf models.2
Compare the results
The comparison view shows how your trained model scores against the others on the same rubric. Since the model was trained specifically on this task, you should see it perform competitively — often matching or beating larger general-purpose models on quality, while being smaller and cheaper to run. If the results aren’t where you want them, refine your training data and retrain before deploying.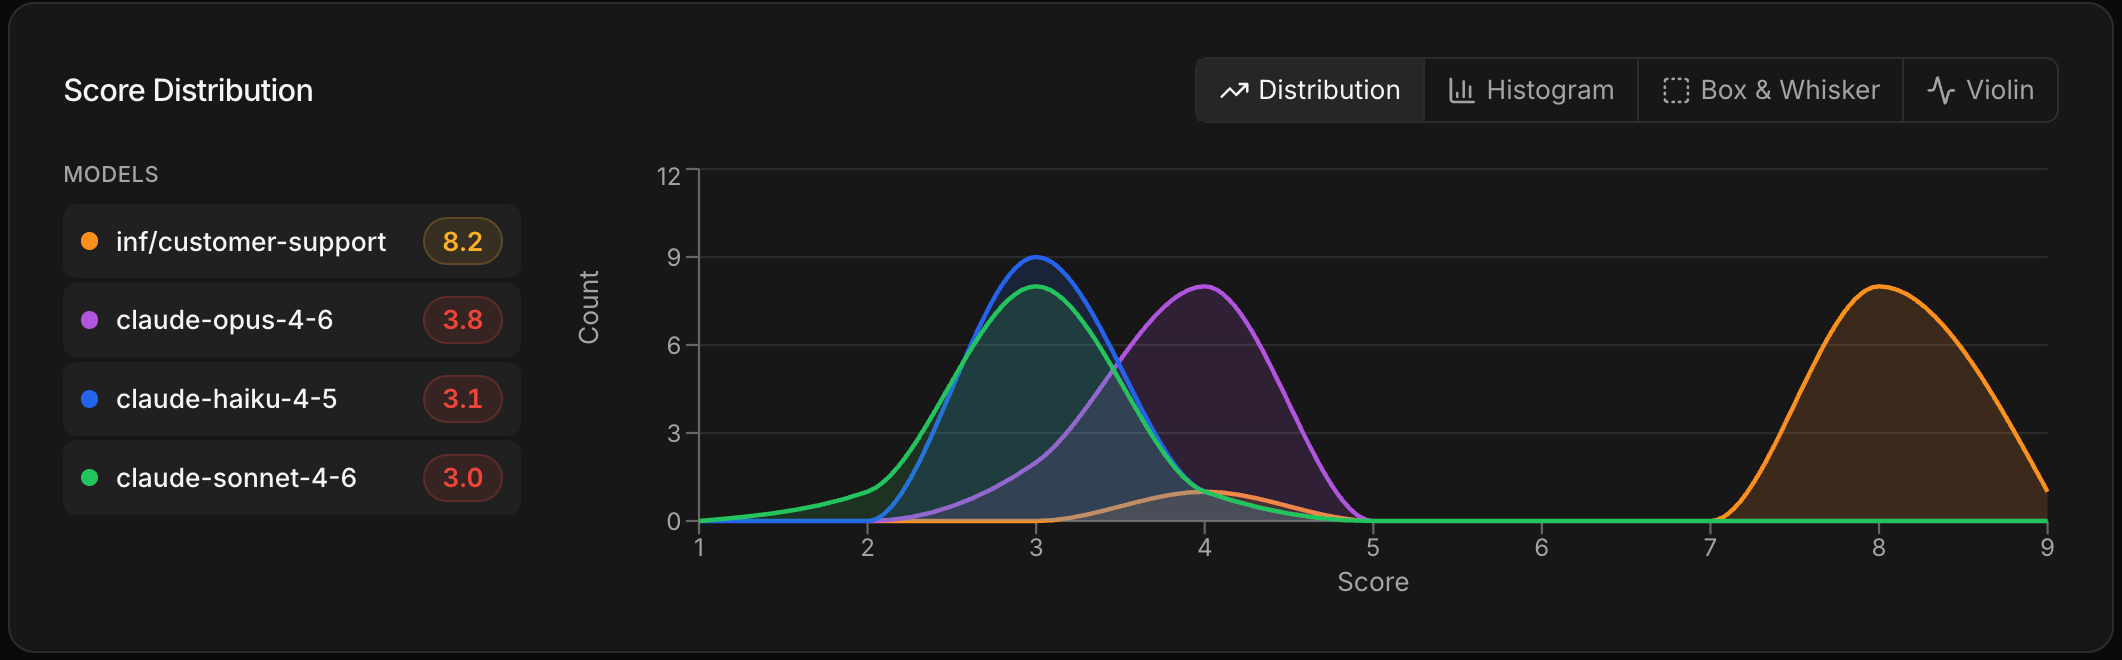
What you just learned
- Training teaches a model your specific task using your data, with the rubric guiding quality during the process
- Mid-training evals give you visibility into whether training is working before it finishes
- Deployment puts the trained model behind the same API you already use — no code changes beyond swapping the model name
- Post-training evals let you validate that the trained model actually outperforms alternatives on your criteria
Next steps
Choose a recipe
Understand recipe tiers and how to pick the right one for your task.
Launch a training run
The full training flow with your own data — cost and duration estimates included.
Call your deployment
Full production setup for calling your deployed model.
Monitor with Gateway
Track your deployed model’s cost, latency, and quality over time.