

Get Started
Compare Models with AutoEvals
AutoEvals answer one question: is there a better model for your workload than the one you run today? Inference platform samples your recent production traffic, replays each sample against a set of candidate models, scores every output with LLM judges, and recommends a model with supporting evidence. You do not build a dataset, write a rubric, or configure a judge.
In the dashboard, AutoEvals live on the Compare Models tab of each task and agent.
This guide takes you from integration to your first completed comparison.
Before you start
AutoEvals run on your real traffic, so Inference platform needs to see that traffic first. Integrate one of these:
- Gateway. Route your LLM calls through the Inference Gateway. Requests are recorded and grouped into tasks. Follow Record Your First LLM Call.
- Tracing. Report traces from your app with the tracing SDK. LLM calls are grouped under agents. Follow Capture Your First Trace.
Either path works. A comparison is always scoped to one task or one agent, and it samples that scope's traffic from a time window you pick. The more traffic in the window, the more representative the sample, so let your app run normally for a while before you compare.
Run your first comparison
Open the Compare Models tab
For Gateway traffic: go to Gateway → Tasks, open your task, and select the Compare Models tab. If your requests do not set a task ID, they are grouped under the Default task.
For traced apps: go to Agents, open your agent, and select the Compare Models tab.
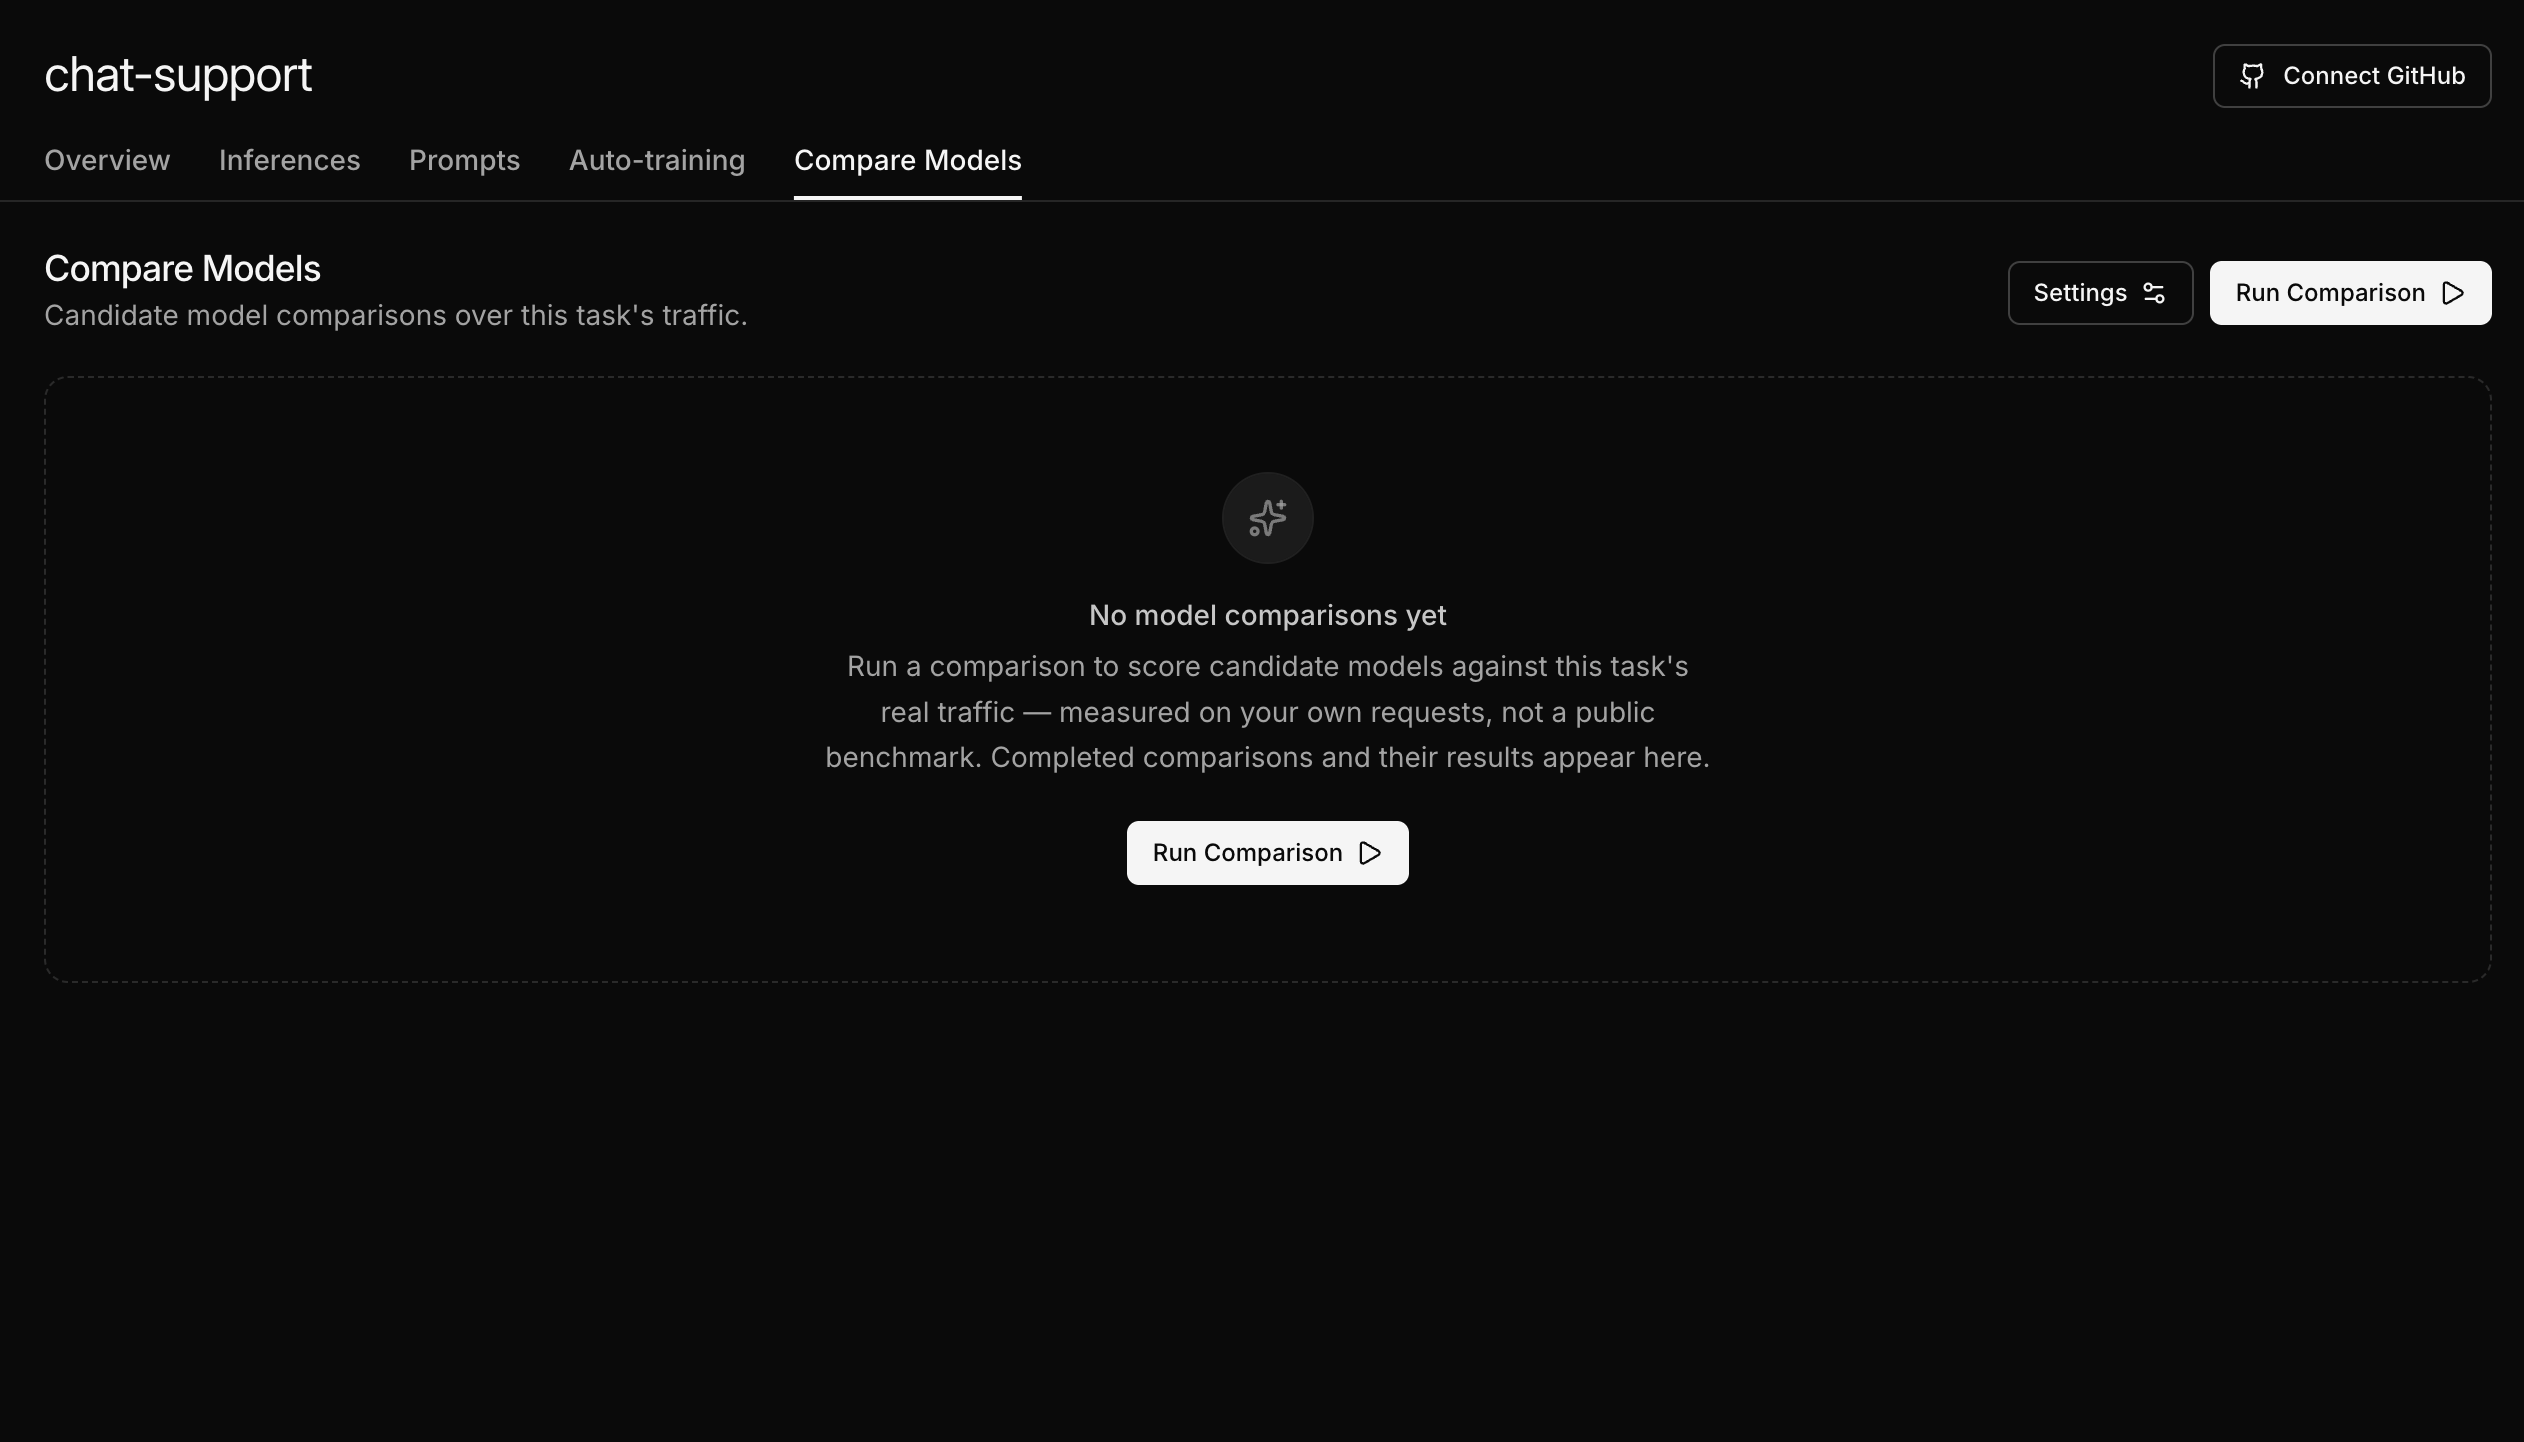
Start a run
Click Run Comparison. The comparison dialog opens with sensible defaults: a 30 day traffic window, 100 samples per model, and the models recommended for your task pre-selected in the model catalog. For a first run, keep the defaults and click Run.
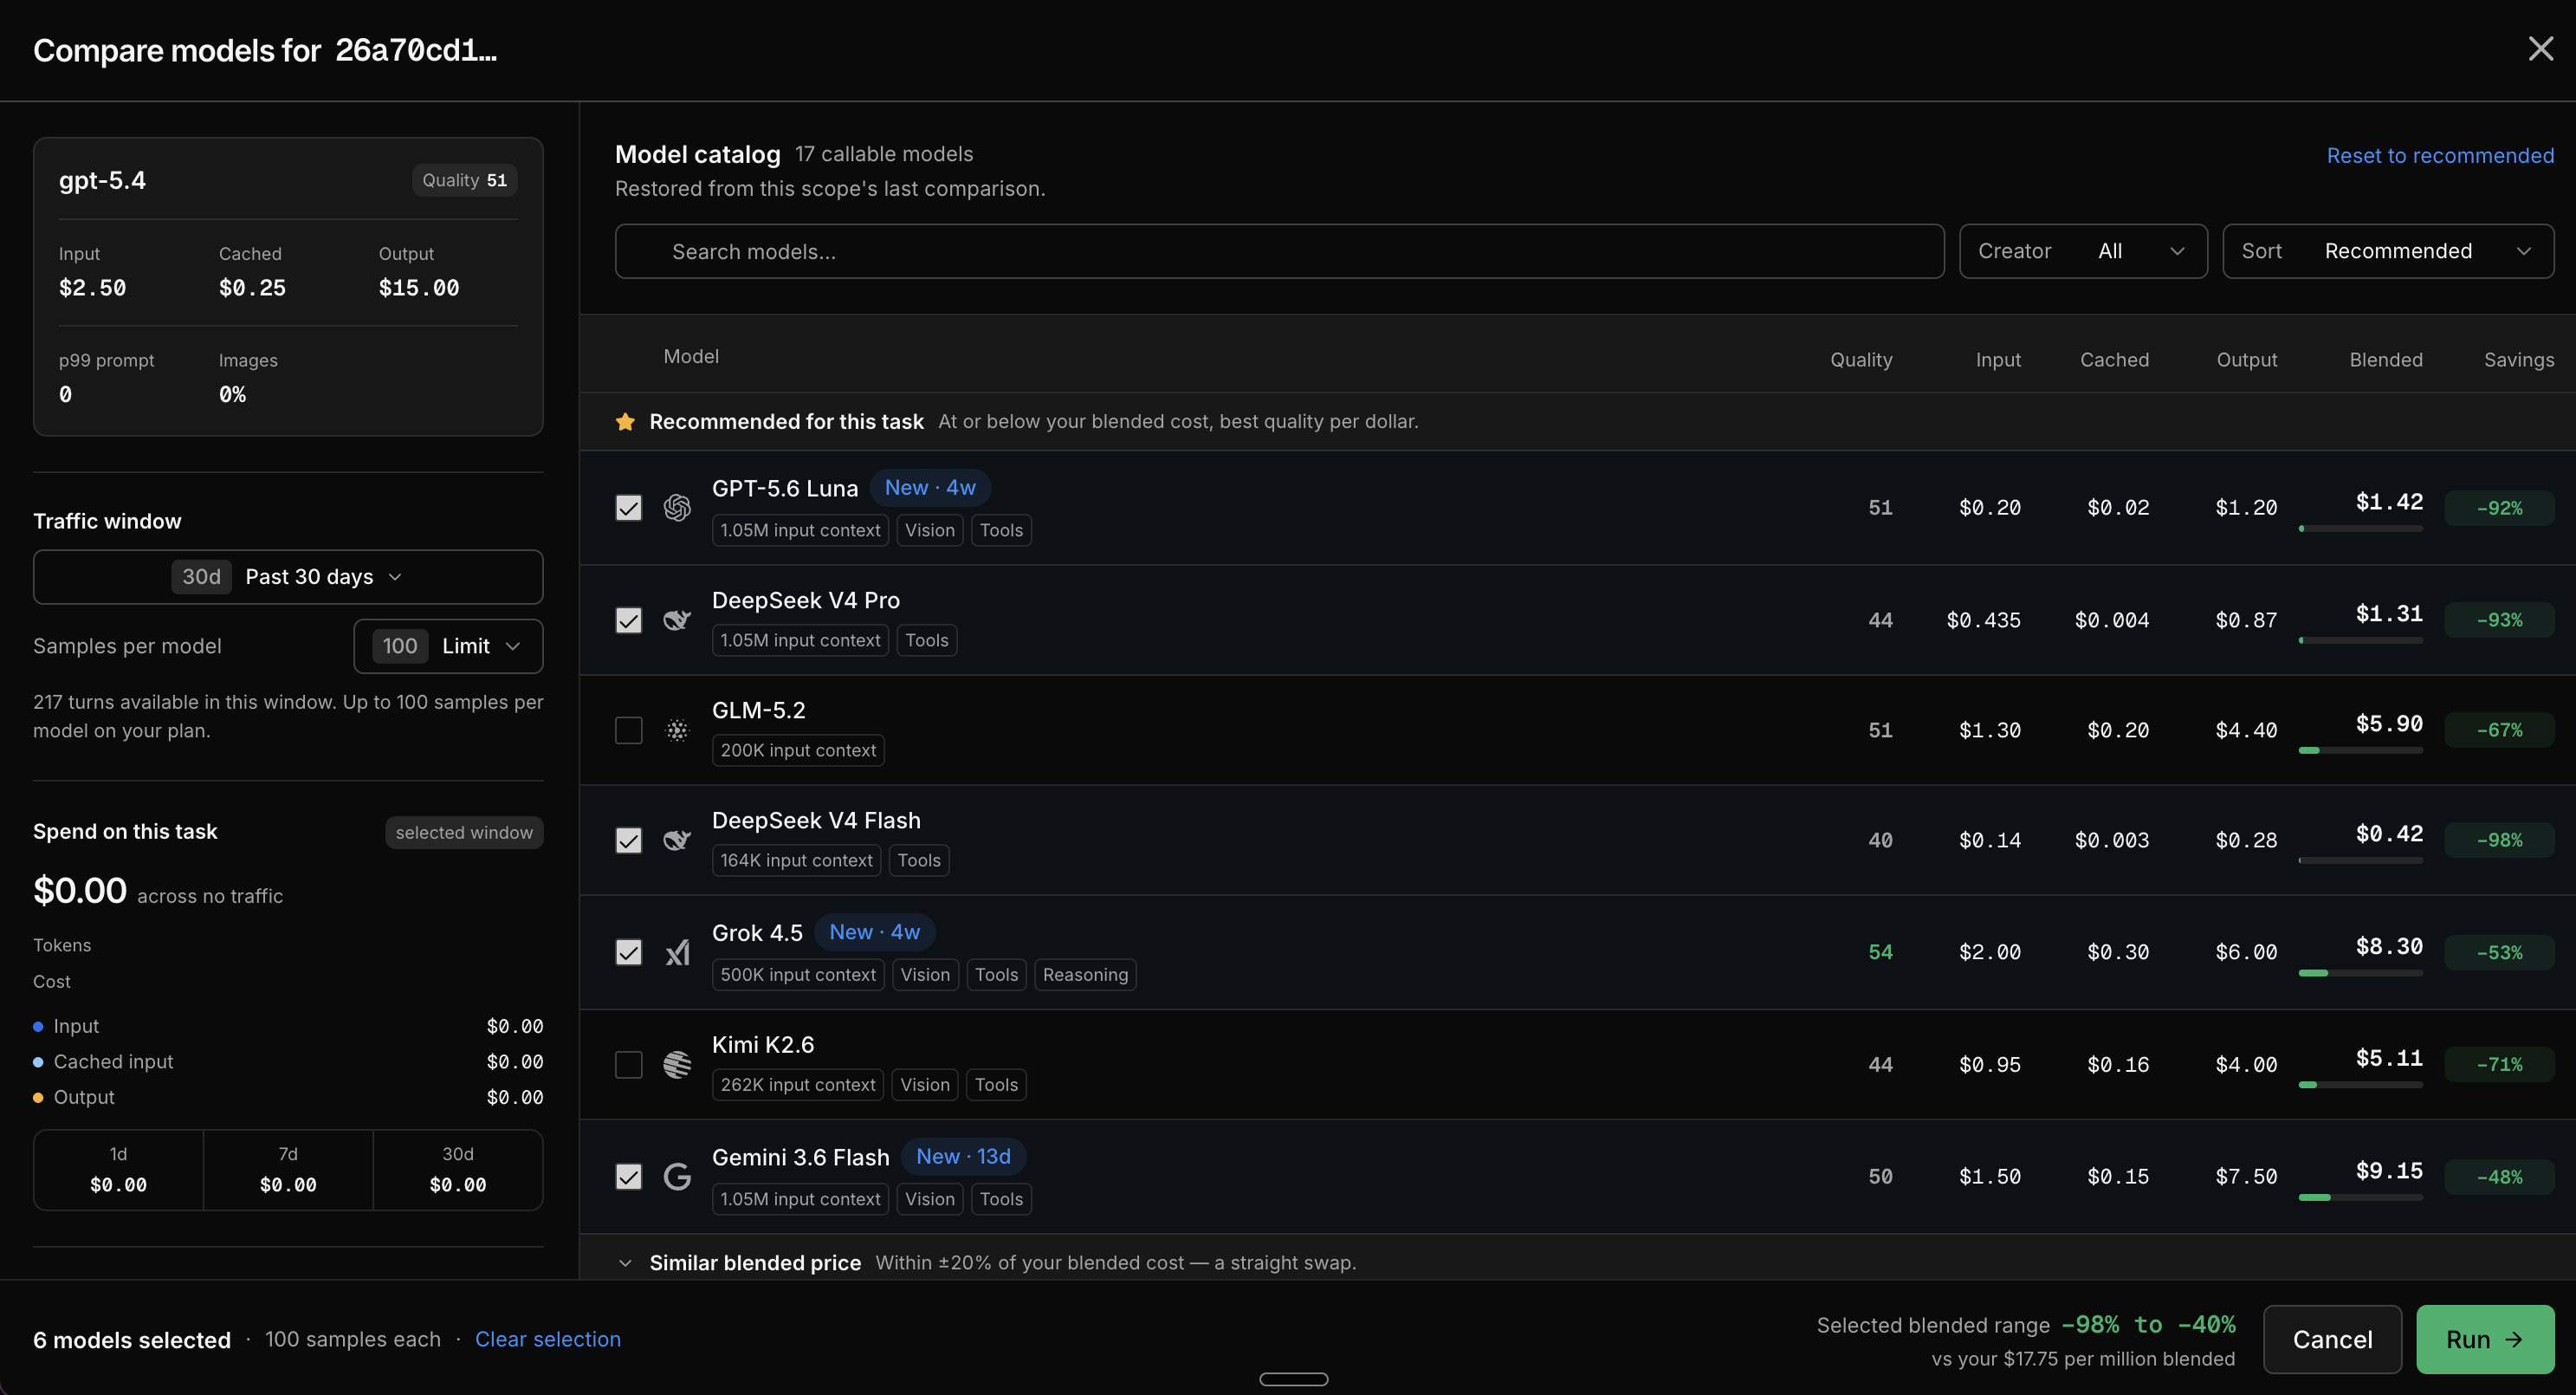
The dialog also shows your recent spend on this task and how each candidate's blended price compares to your current model, and warns you if the run would exceed your team's daily eval limit.
Watch the run execute
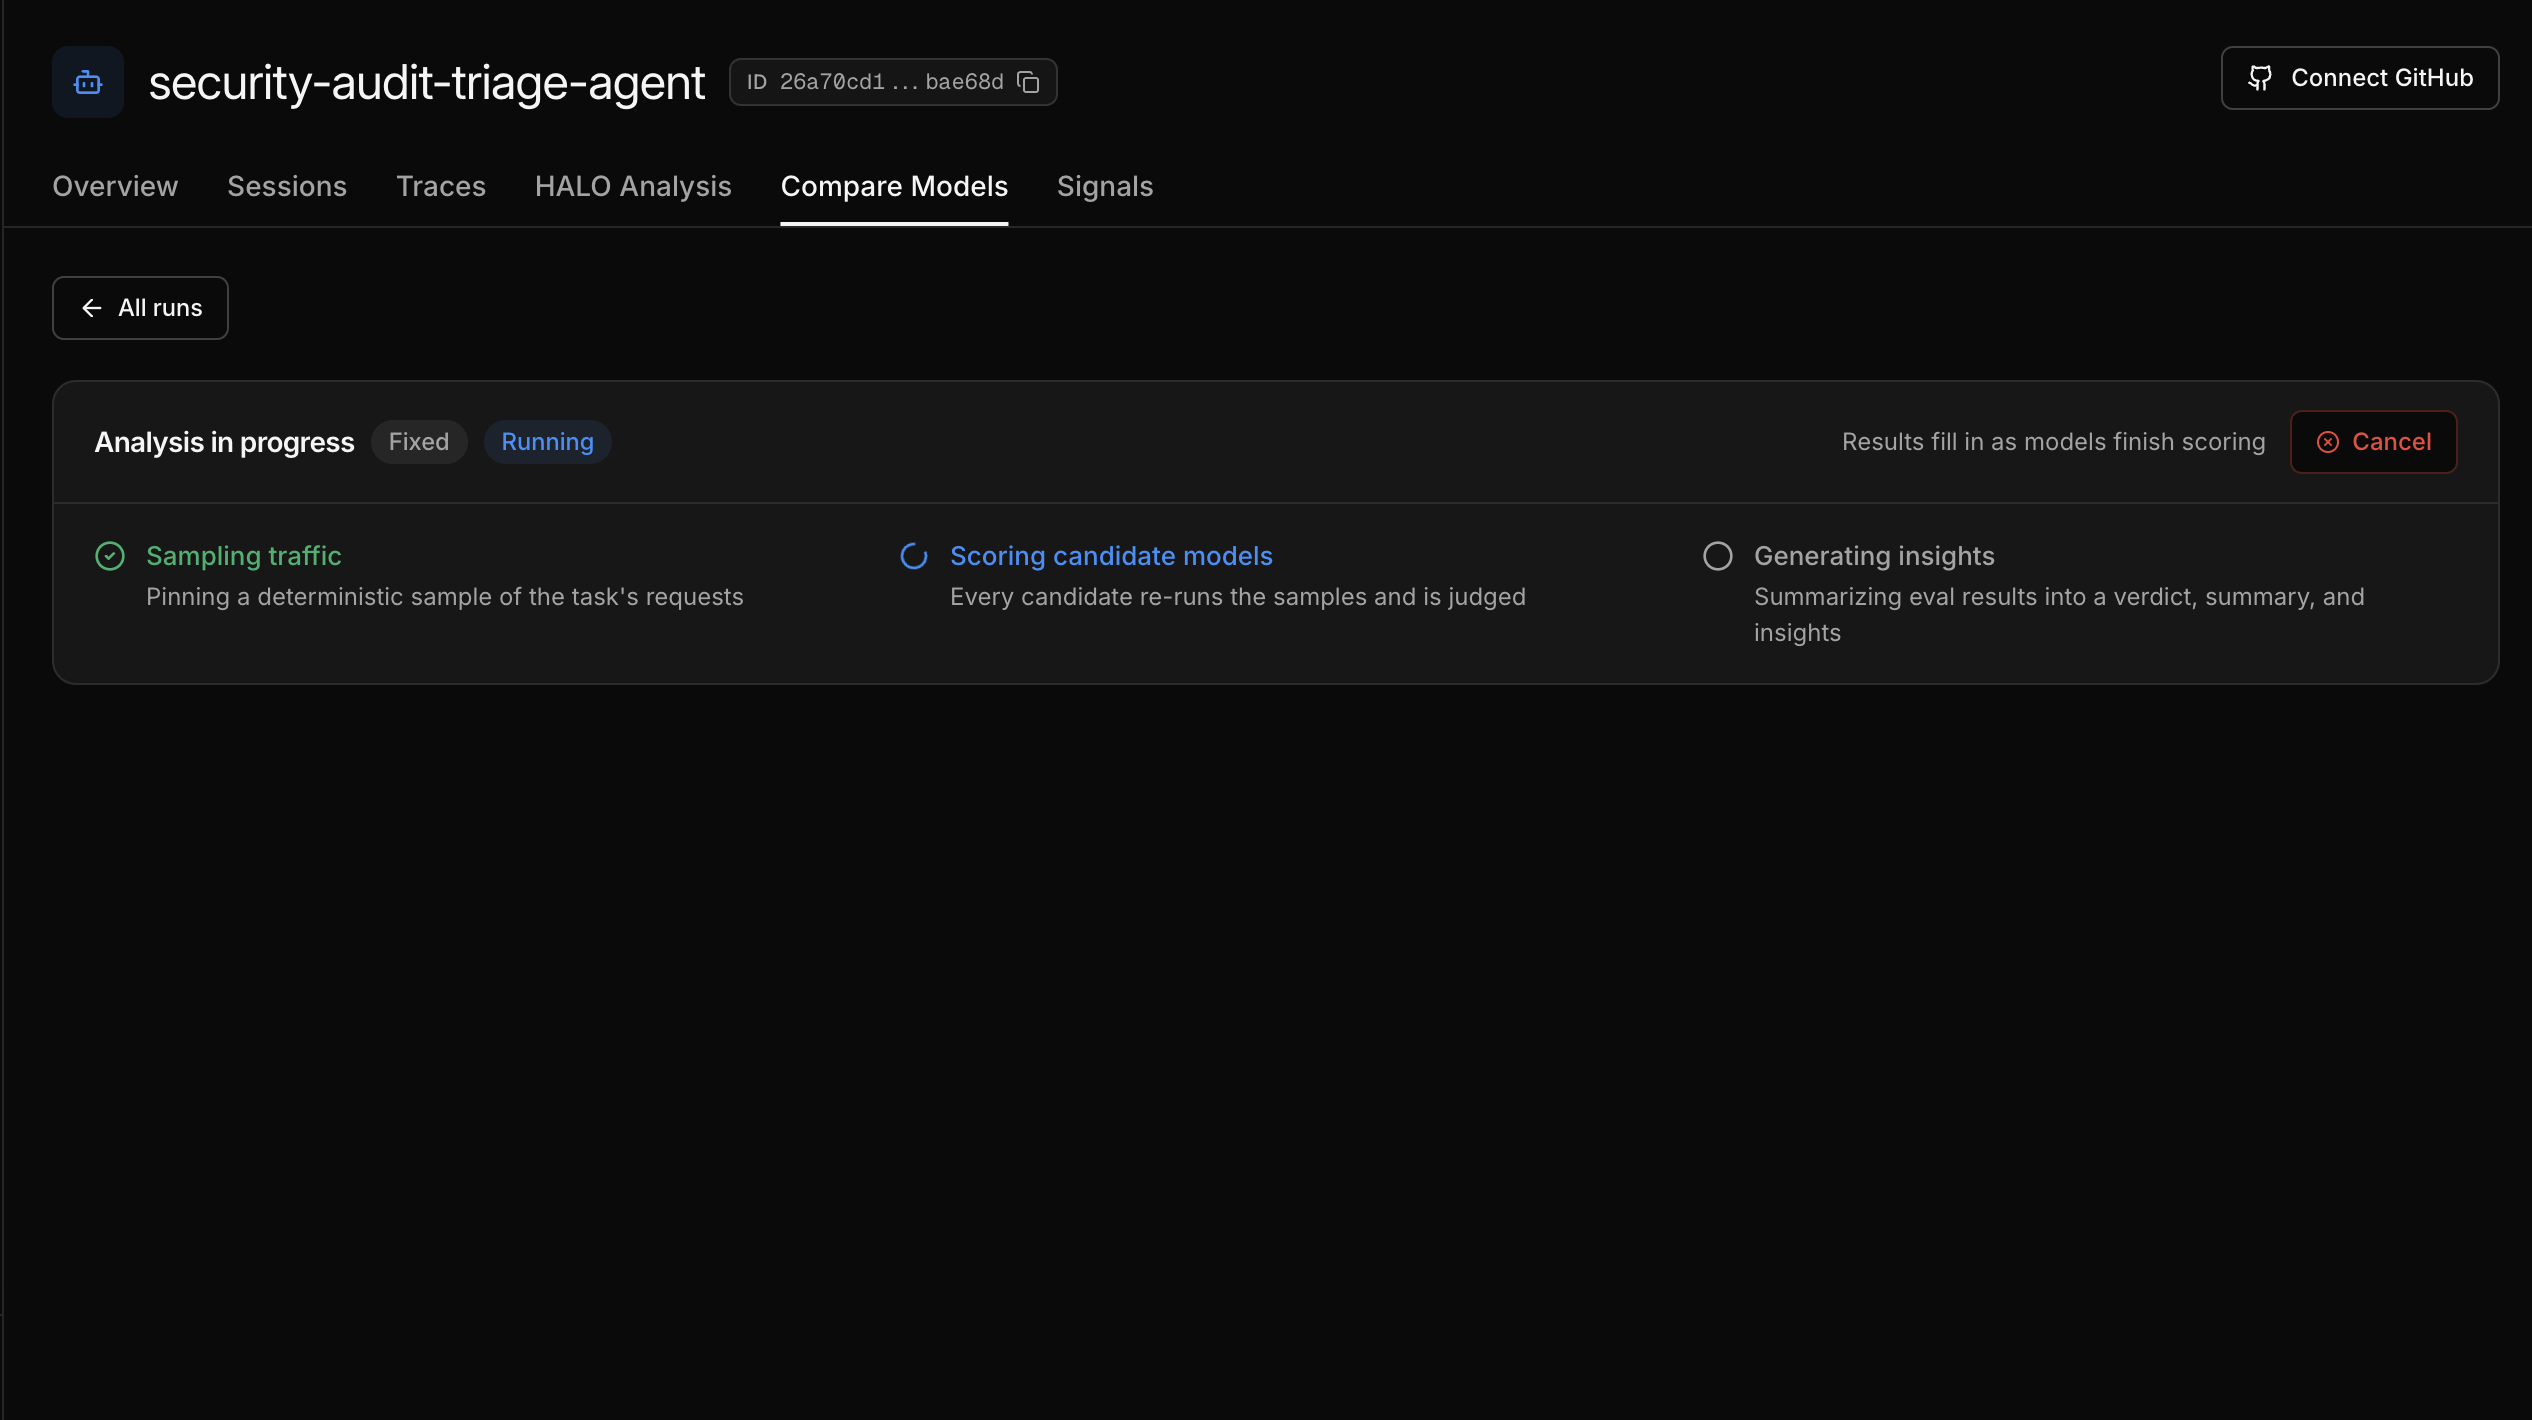
The run report opens immediately and fills in as the run progresses through three stages:
- Sampling traffic - Inference platform pins a deterministic sample of your requests.
- Scoring candidate models - every candidate re-runs the samples and is judged.
- Generating insights - the scored results are summarized into a verdict and findings.
Results fill in as each model finishes scoring. You can cancel a run at any time.
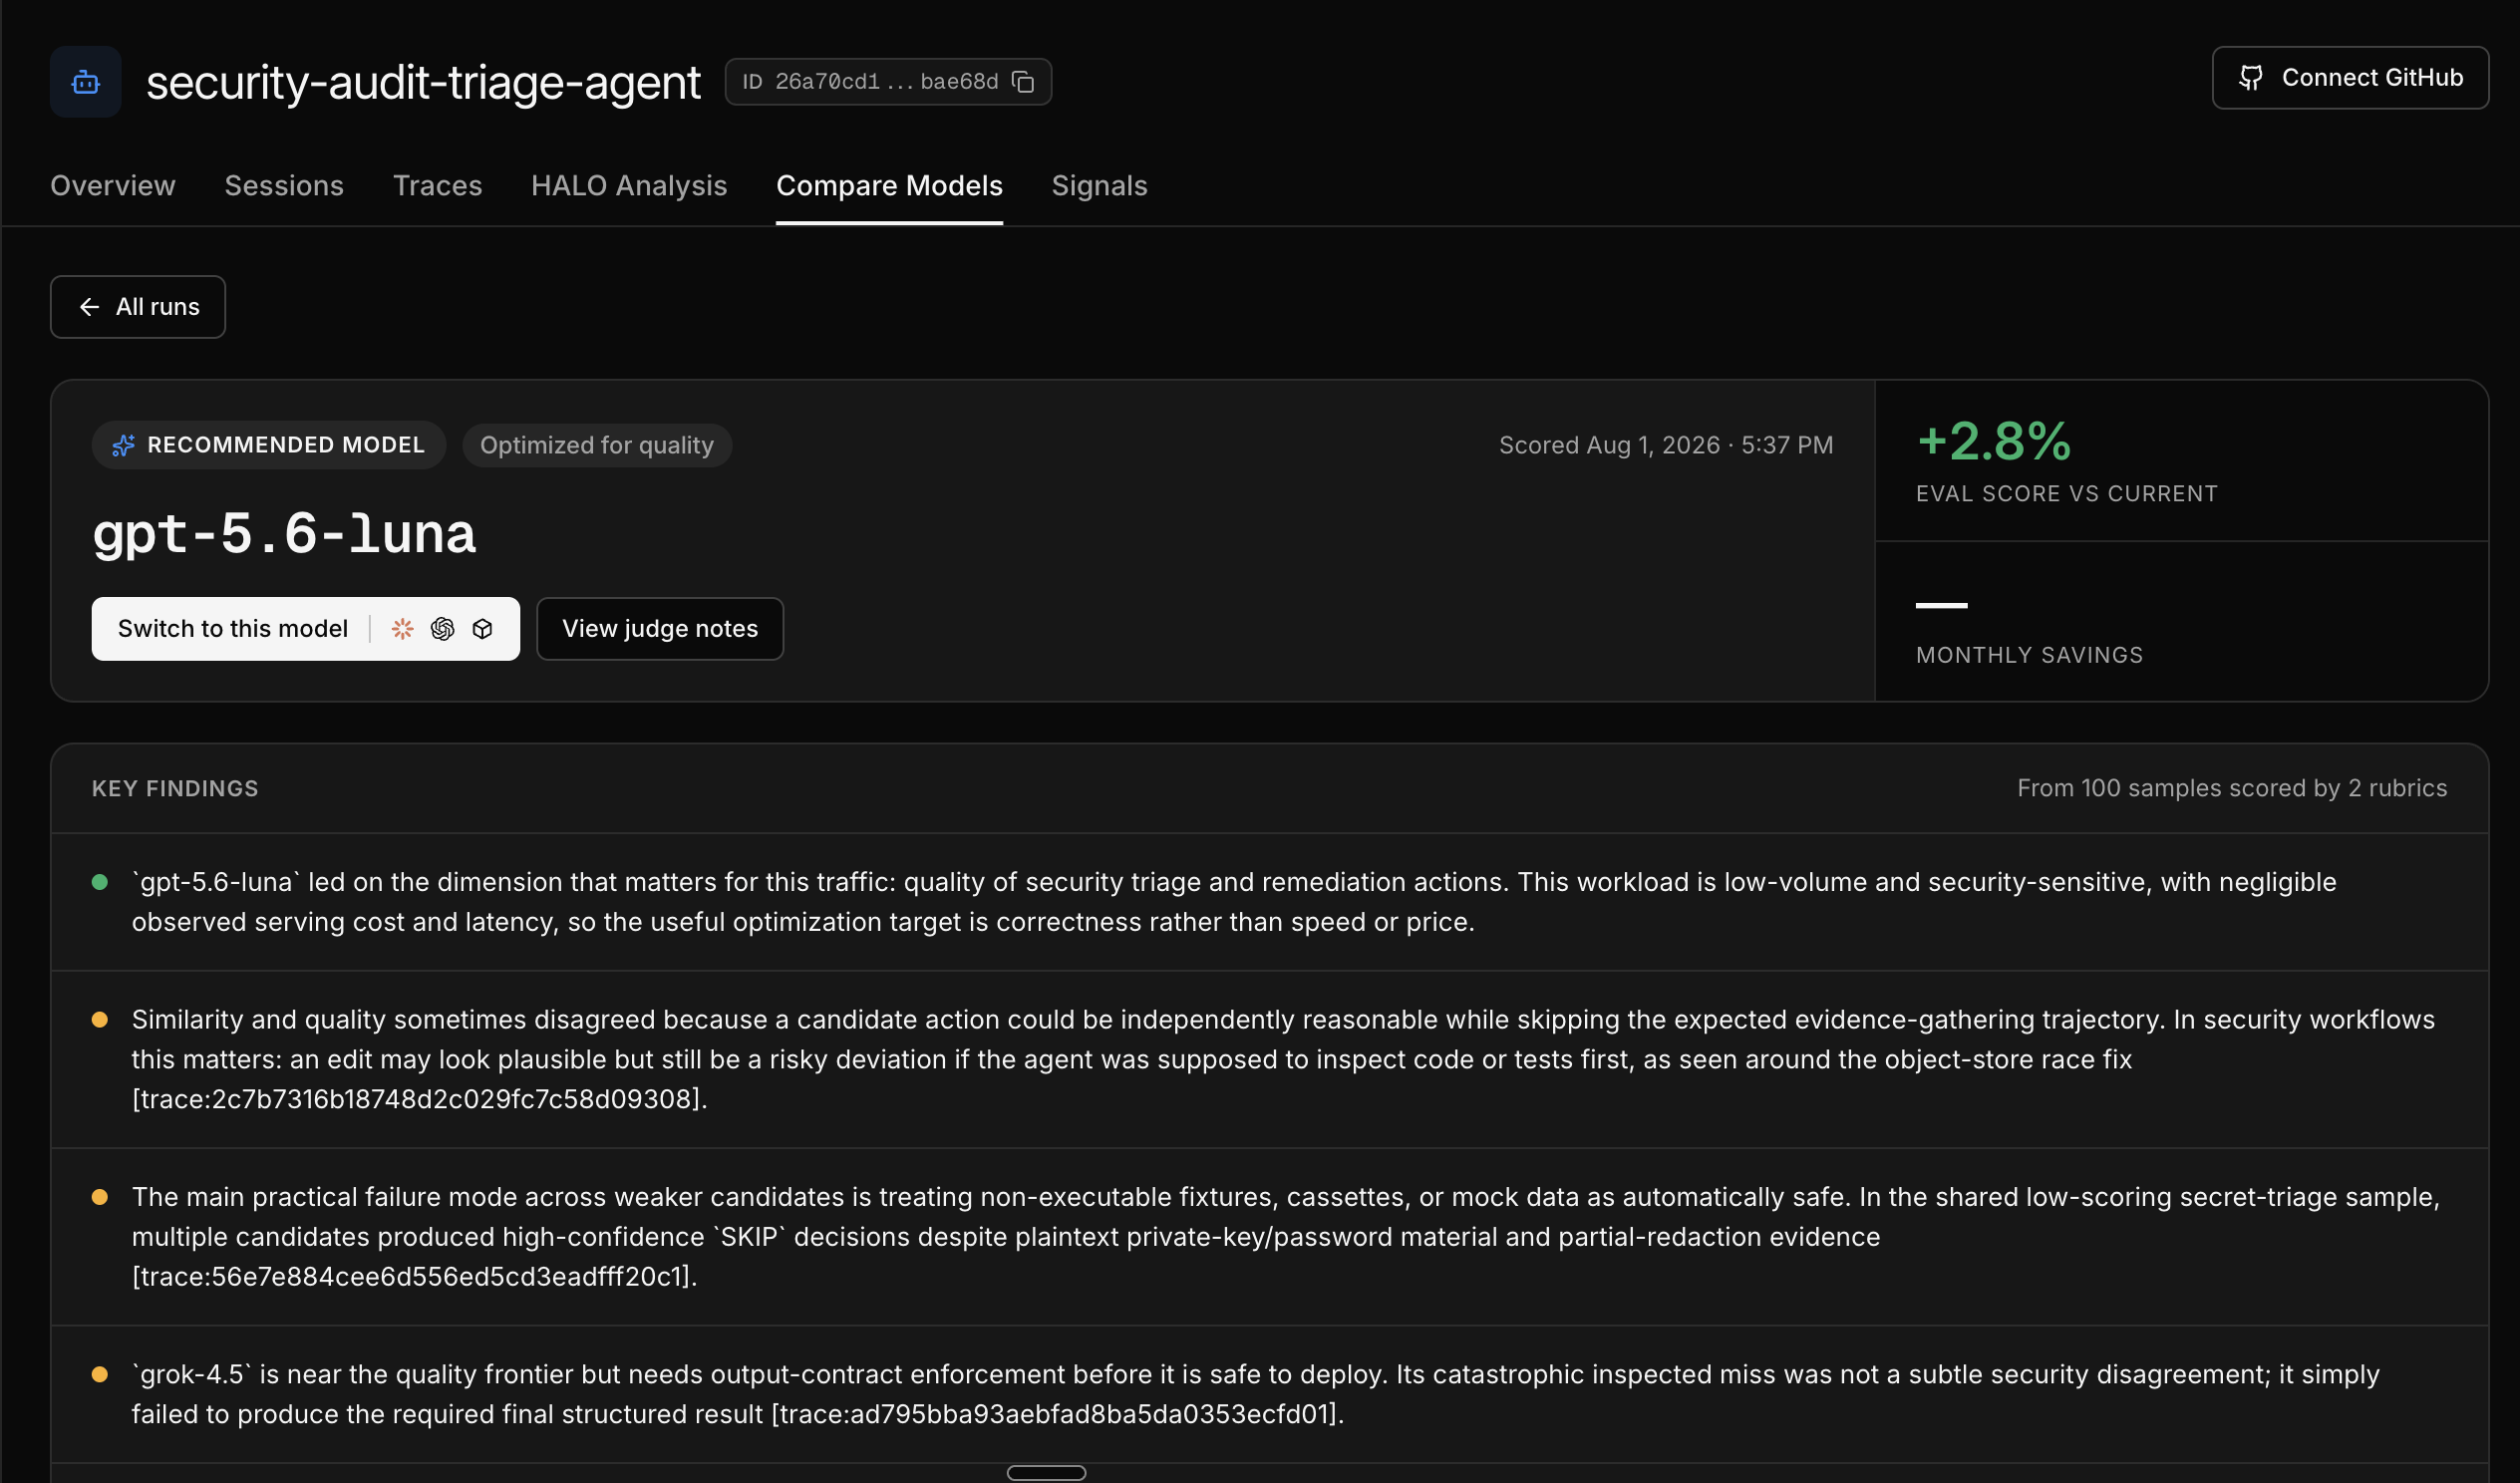
Read the outputs
When the run completes, the report leads with a verdict: switch to a specific model, or keep your current one. Below it you get the estimated monthly savings, key findings from the judged samples, a quality versus cost chart, and a leaderboard that ranks every candidate against your current model on quality, similarity, latency, and price.
From the leaderboard, open the Sample Viewer to read individual model outputs side by side with the judge's reasoning.
What you just learned
- AutoEvals measure candidate models on your own production traffic, not a public benchmark
- Inference platform samples your traffic and scores it with two fixed rubrics, quality and similarity
- The result is a concrete recommendation with evidence you can inspect down to the individual sample