> ## Documentation Index
> Fetch the complete documentation index at: https://docs.inference.net/llms.txt
> Use this file to discover all available pages before exploring further.
# Run Your First Eval
An eval measures which model is better for your task, and by how much. You define a rubric that describes what "good" looks like, run your data through candidate models, and let an LLM judge score the outputs. This is how you know whether a smaller, cheaper model can replace the one you're using today.
This guide uses the **Customer Support Chatbot** demo project, which comes pre-loaded with a dataset and rubric so you can run an eval immediately — no data required. Once you've seen how it works, you can apply the same process to your own data.
## Start the demo project
If you haven't already, create the demo project:
1. From the dashboard, navigate to the **Learn** page (or the **Create a Project** page).
2. Find **Customer Support Chatbot** and click **Start with demo project**.
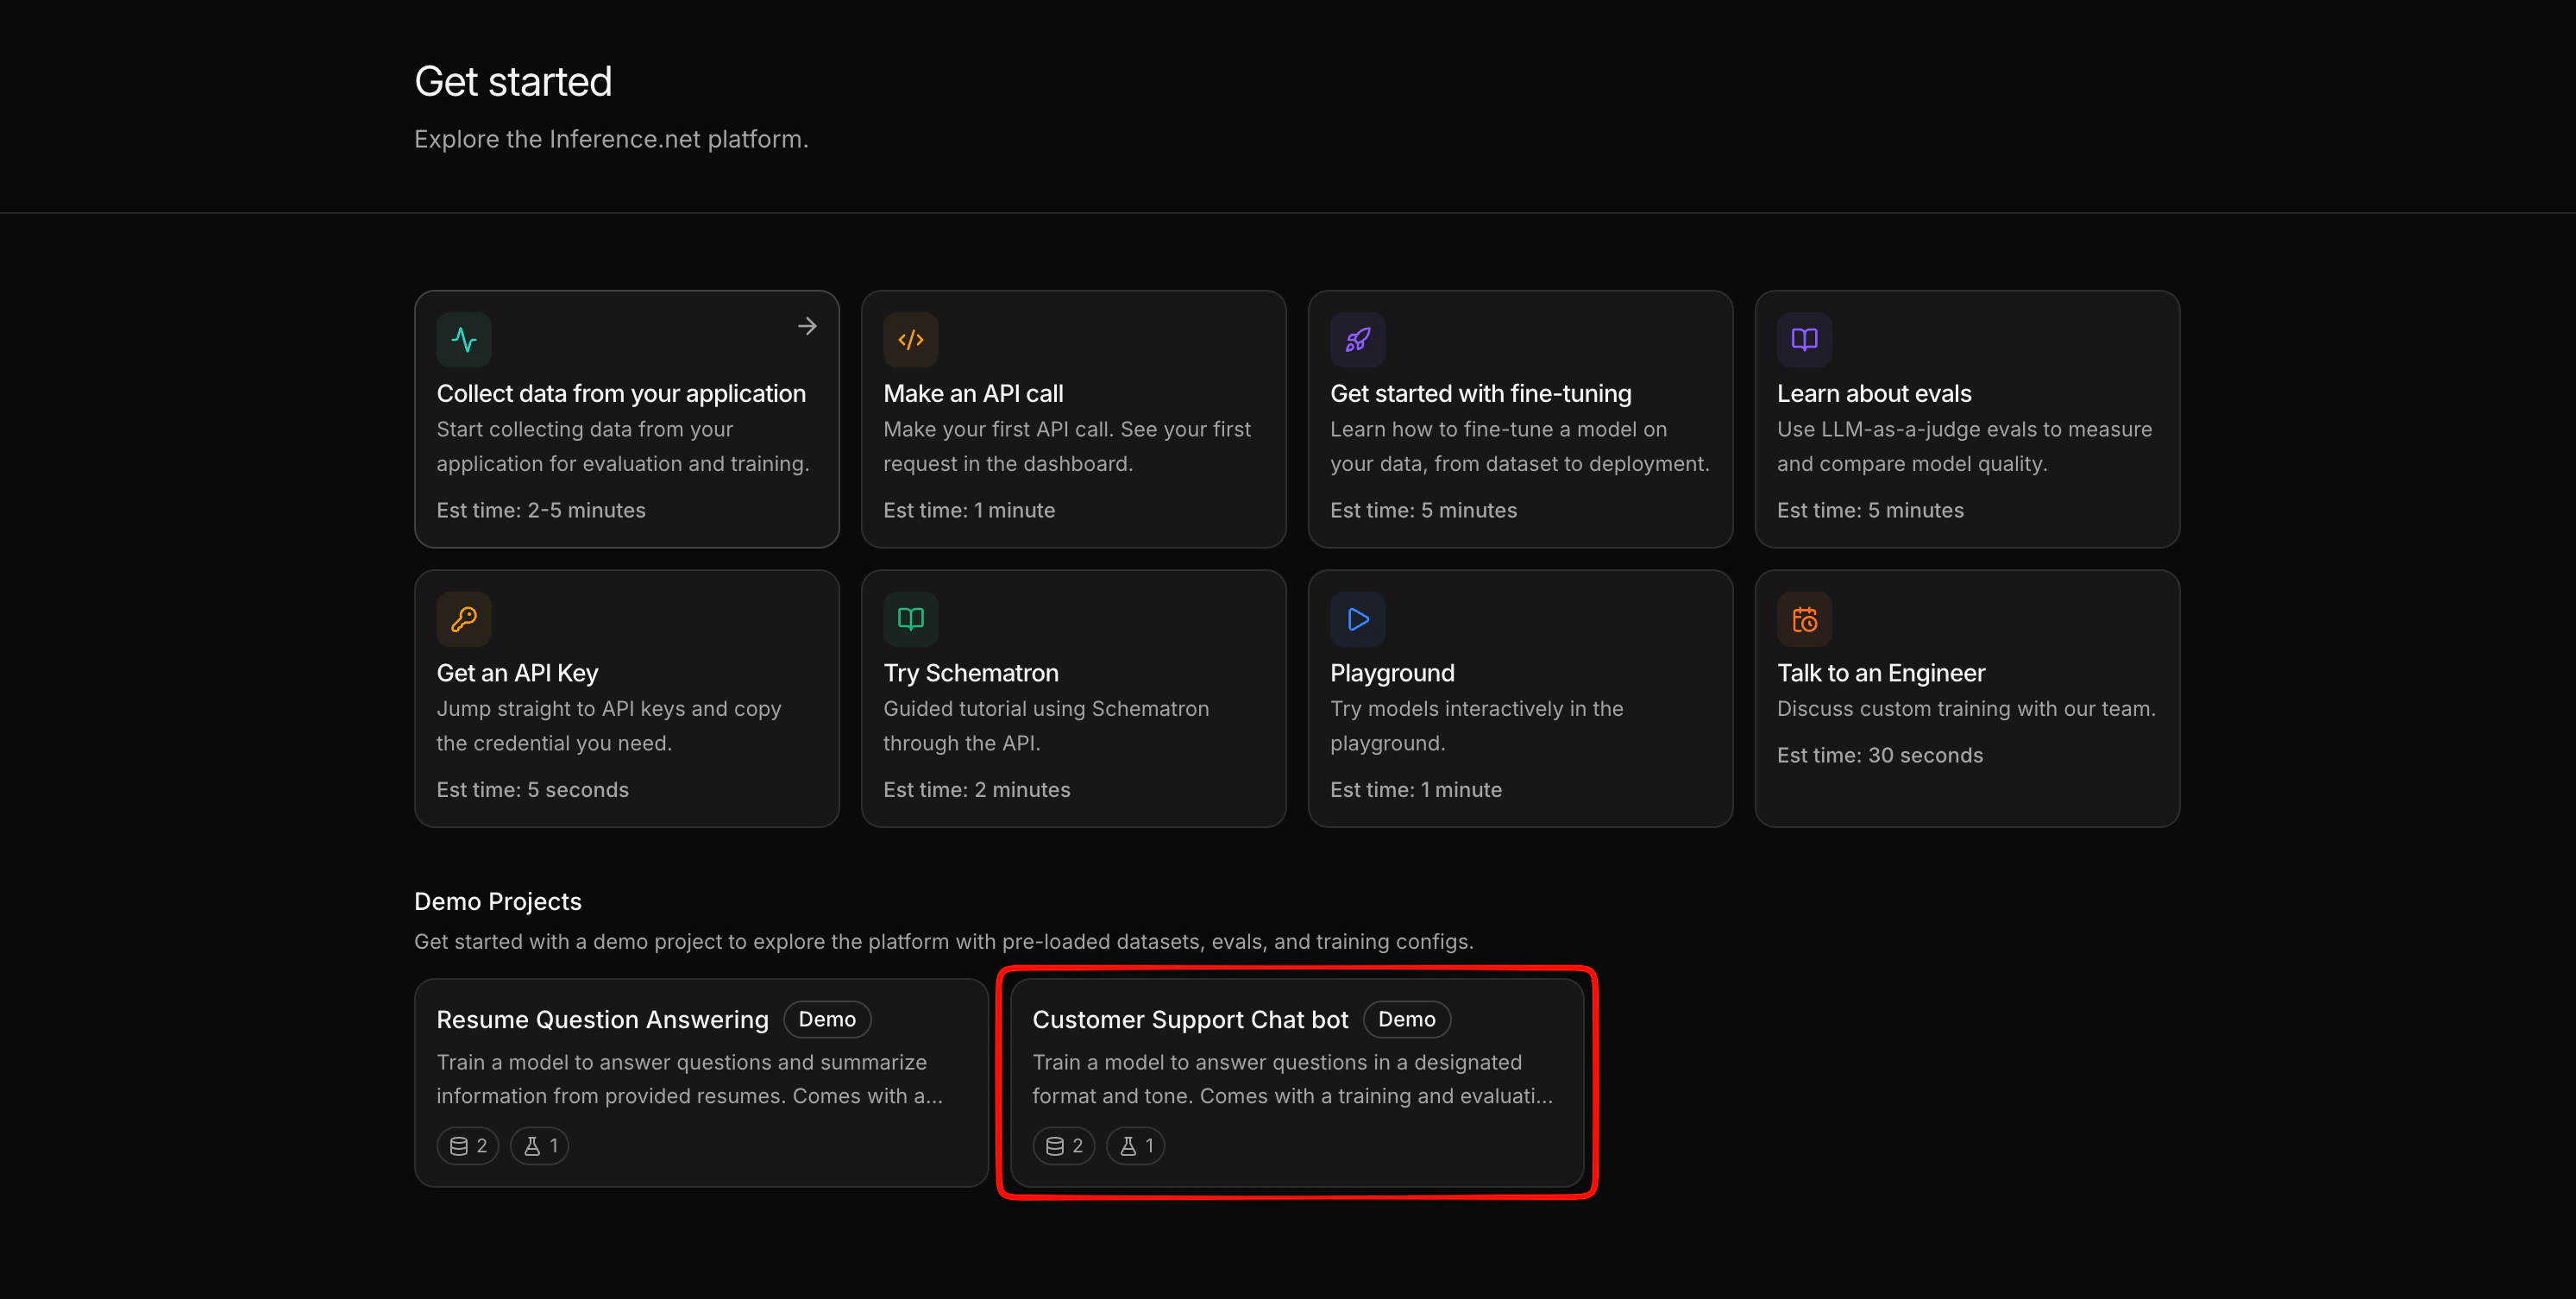 This creates a new project in your account pre-loaded with everything you need:
| Artifact | Name | Purpose |
| ---------------- | ------------------------ | ---------------------------------------------------------------------------------------------- |
| Eval dataset | `customer-support-eval` | Sample customer support conversations to evaluate against |
| Training dataset | `customer-support-train` | Used later for [training a model](/get-started/train-and-deploy) |
| Rubric | Customer support rubric | Defines what a good customer support response looks like — tone, format, and accuracy criteria |
## Run an eval
Open your **Customer Support Chatbot** project and go to the **Evals** tab. Click **New Eval**.
The demo project's rubric and the `customer-support-eval` dataset are already available in your project. Select them.
This creates a new project in your account pre-loaded with everything you need:
| Artifact | Name | Purpose |
| ---------------- | ------------------------ | ---------------------------------------------------------------------------------------------- |
| Eval dataset | `customer-support-eval` | Sample customer support conversations to evaluate against |
| Training dataset | `customer-support-train` | Used later for [training a model](/get-started/train-and-deploy) |
| Rubric | Customer support rubric | Defines what a good customer support response looks like — tone, format, and accuracy criteria |
## Run an eval
Open your **Customer Support Chatbot** project and go to the **Evals** tab. Click **New Eval**.
The demo project's rubric and the `customer-support-eval` dataset are already available in your project. Select them.
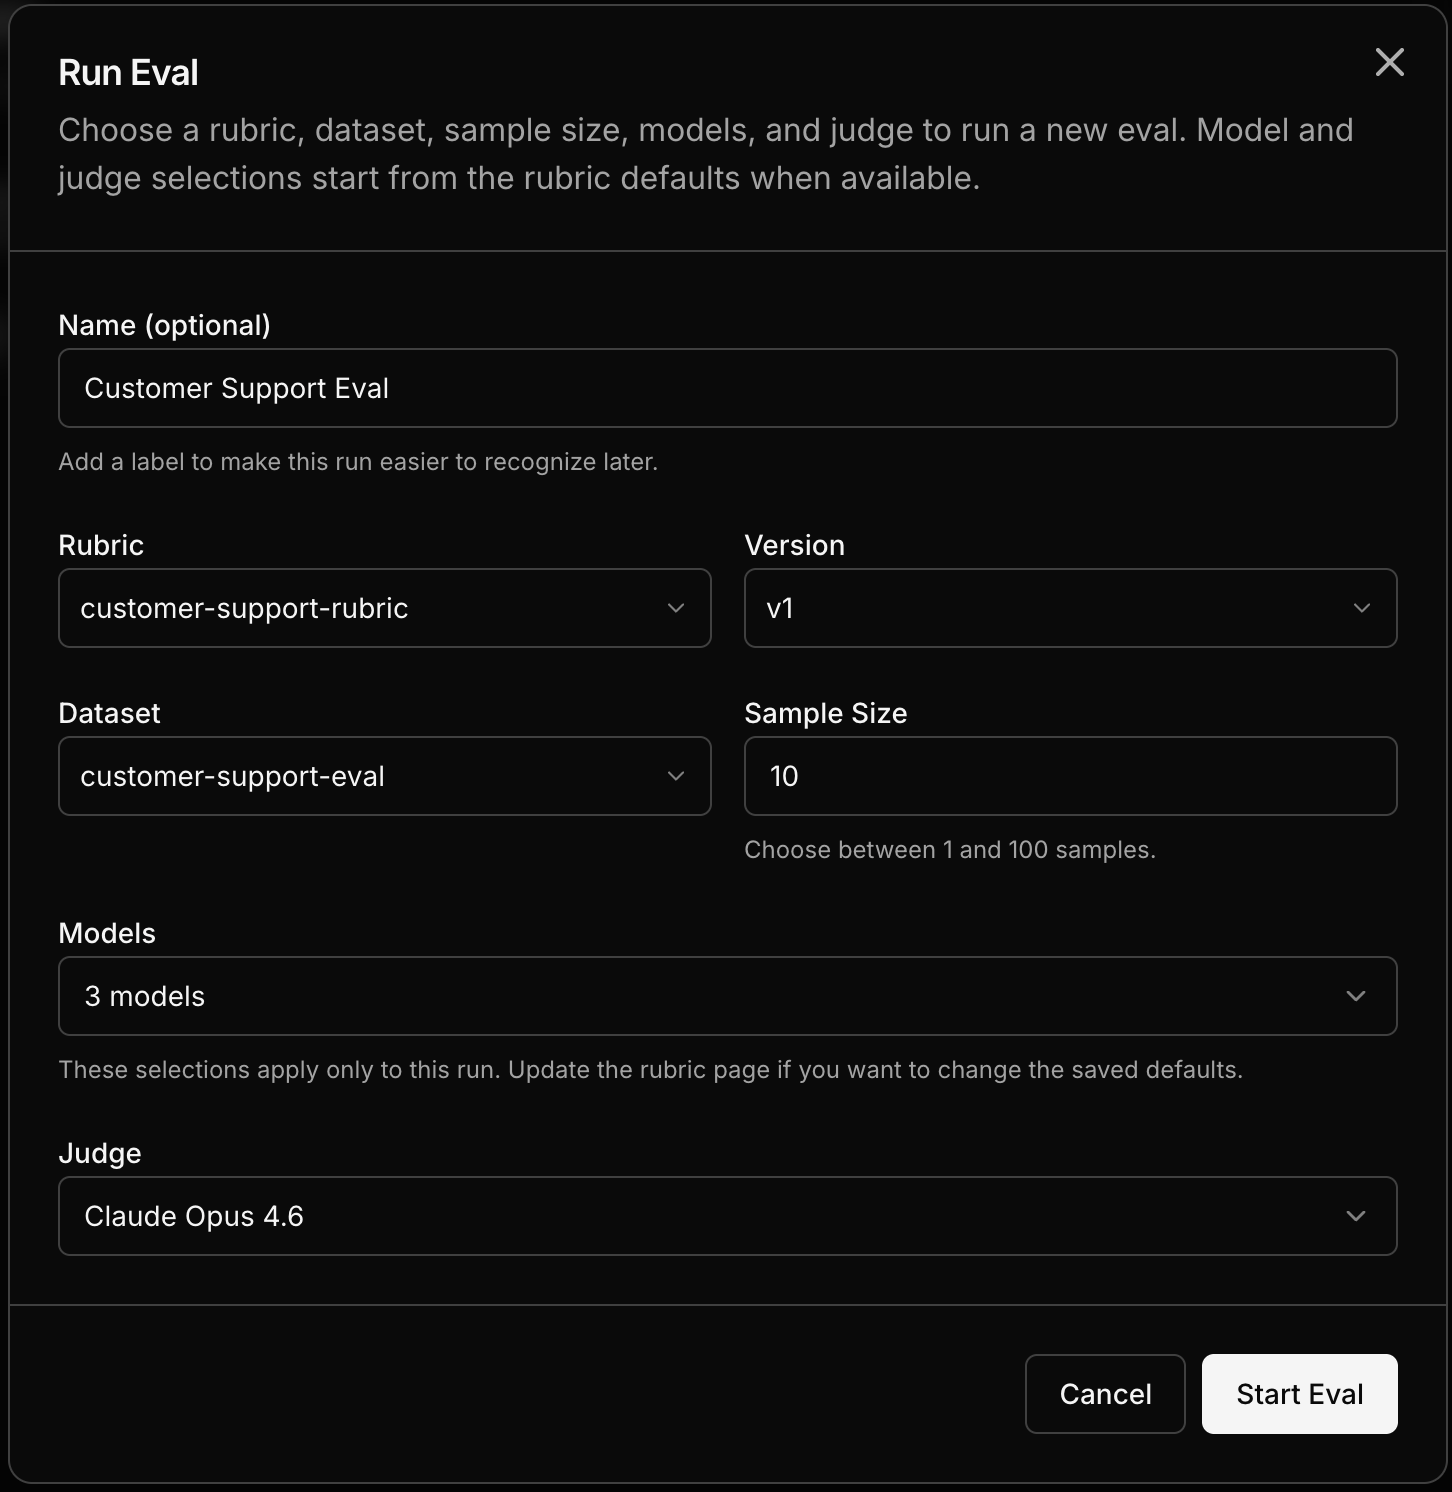 Choose two or more models to evaluate. You can pick any combination from the model catalog — OpenAI, Anthropic, open-source, or any other available model. For a quick comparison, try picking a large model and a smaller one to see how they stack up.
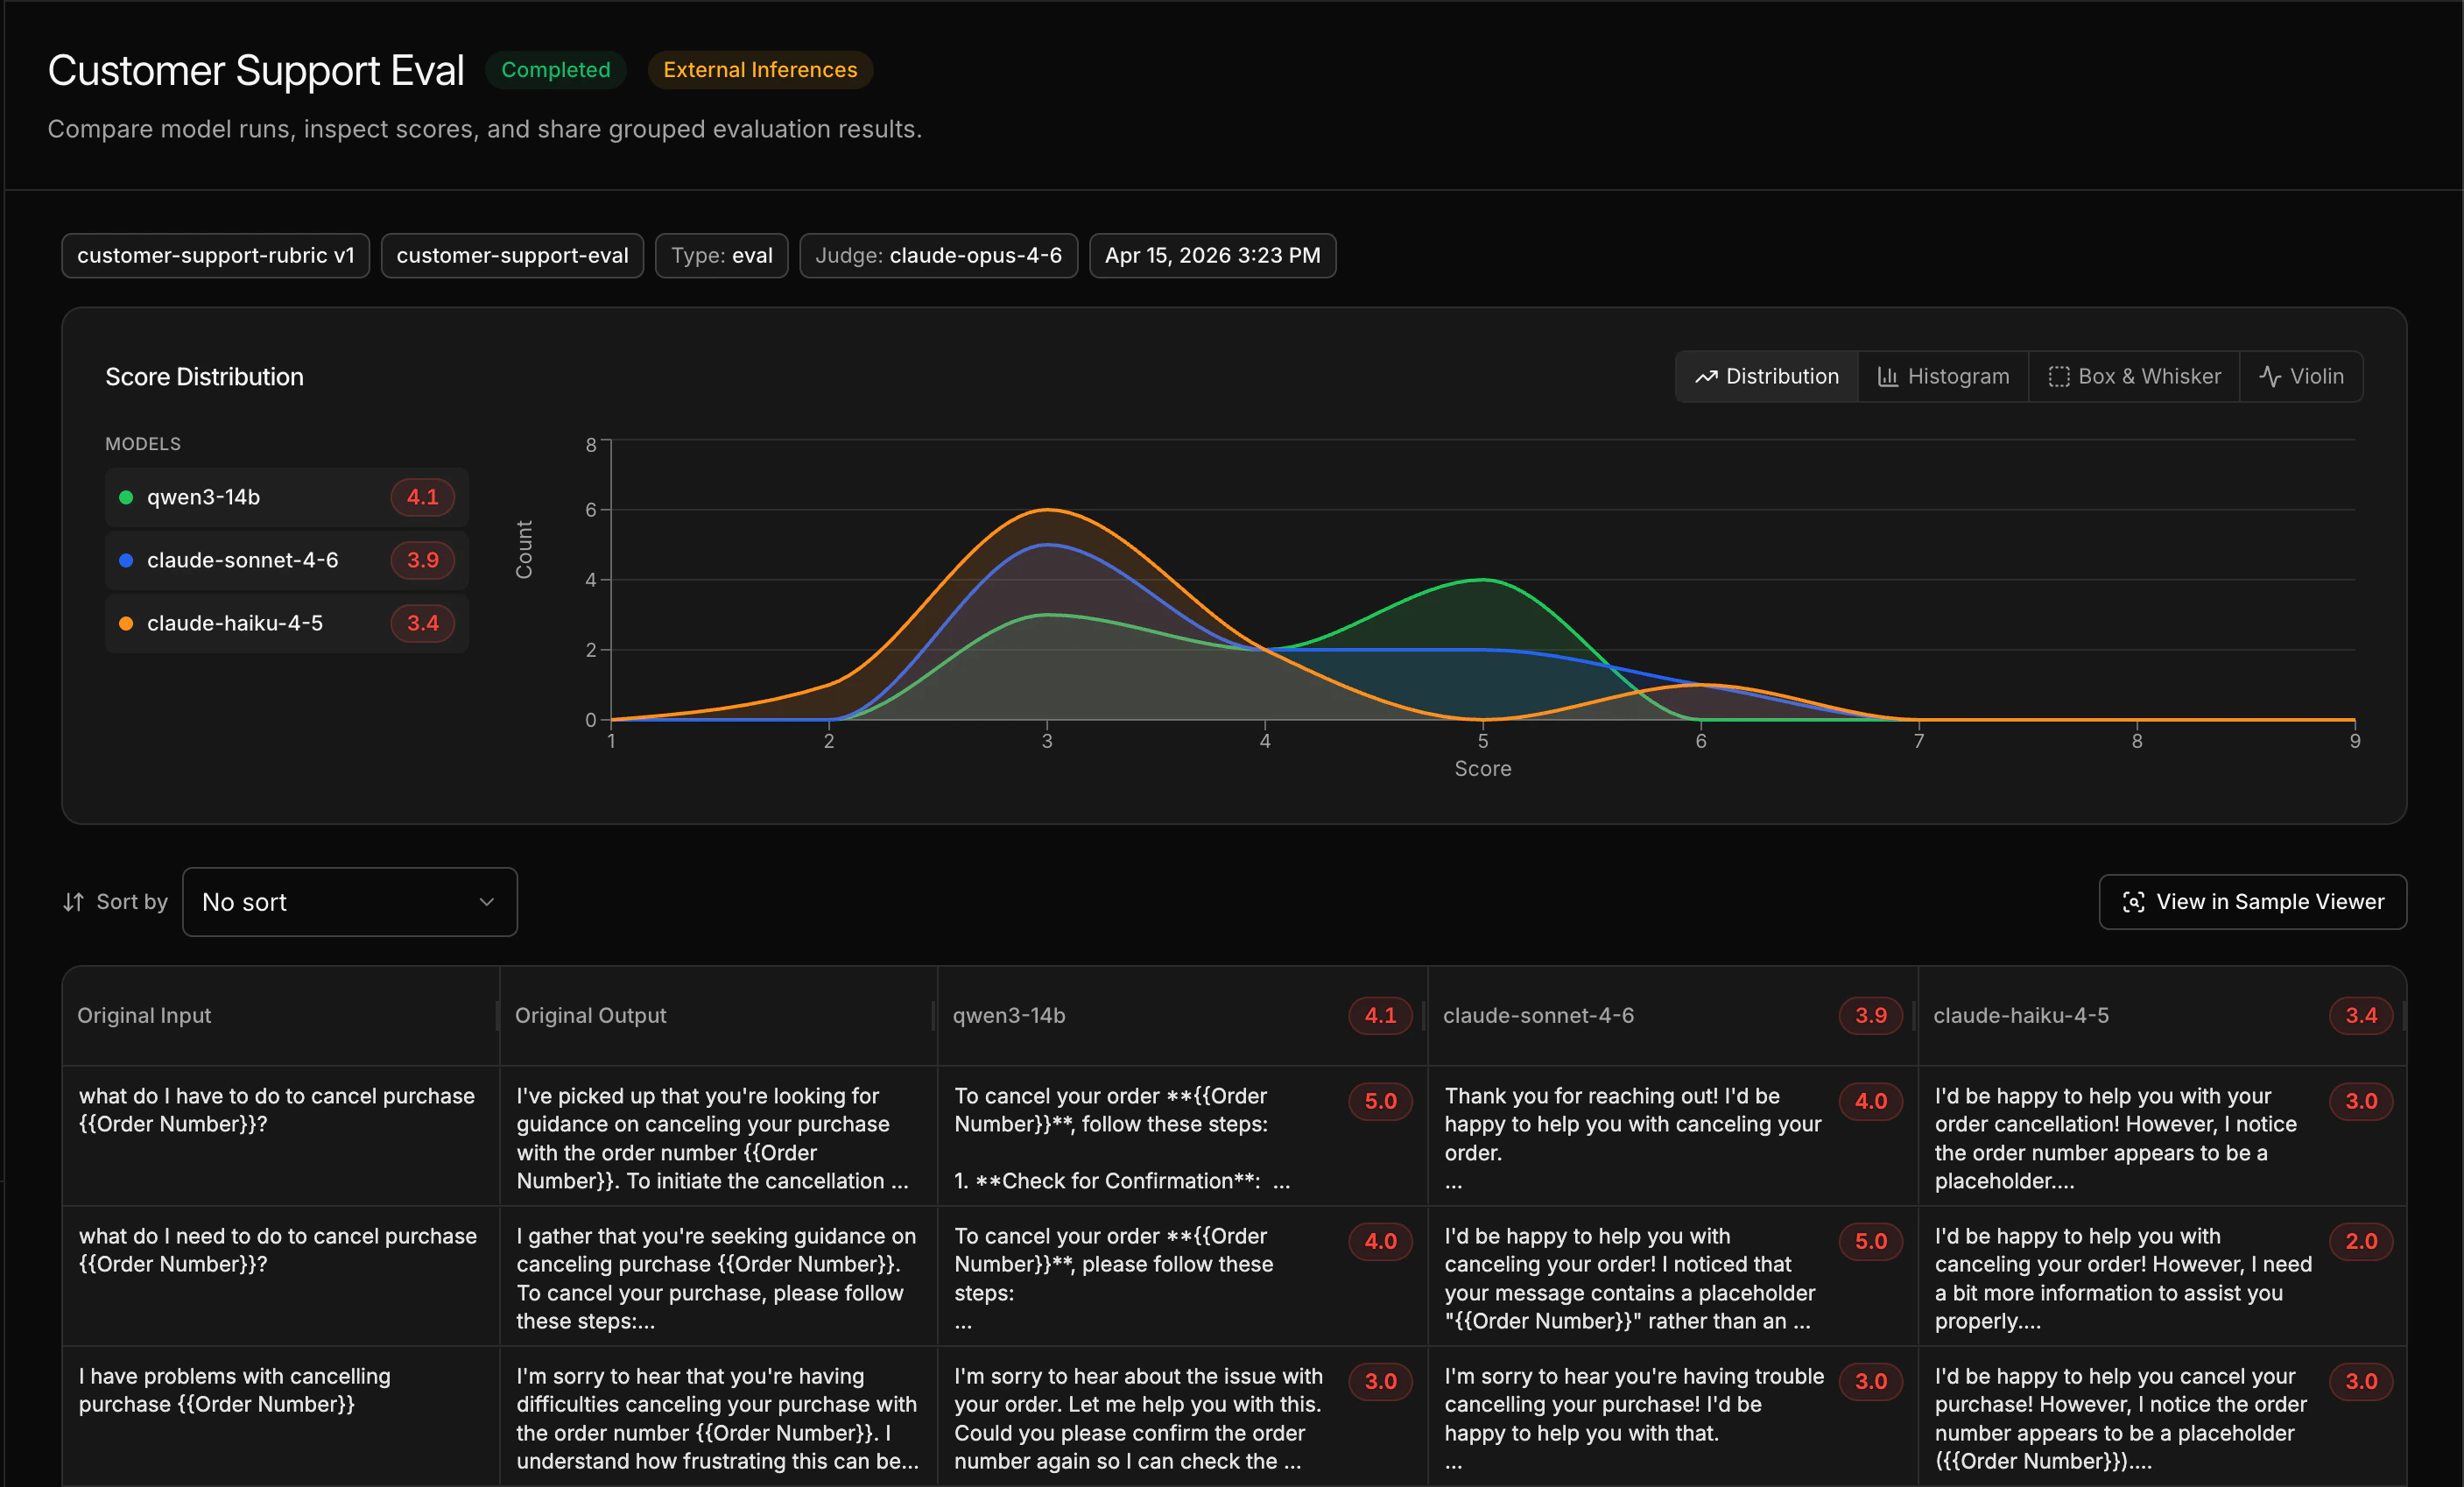
Click **Run**. Each sample from the dataset is sent to each model, and an LLM judge scores every response against the rubric.
When the eval completes, the comparison view shows side-by-side scores across all models and samples. Look at overall scores to see which model wins, and drill into individual samples to understand where models differ.
Choose two or more models to evaluate. You can pick any combination from the model catalog — OpenAI, Anthropic, open-source, or any other available model. For a quick comparison, try picking a large model and a smaller one to see how they stack up.
Click **Run**. Each sample from the dataset is sent to each model, and an LLM judge scores every response against the rubric.
When the eval completes, the comparison view shows side-by-side scores across all models and samples. Look at overall scores to see which model wins, and drill into individual samples to understand where models differ.
 ## What you just learned
* **Rubrics** define your quality bar in plain English — the LLM judge uses them to score outputs
* **Evals** run your data through multiple models and score the results, giving you a data-driven comparison
* You can re-run evals anytime — after changing the rubric, adding models, or later after [training a custom model](/get-started/train-and-deploy) to see how it compares
## Next steps
Use the same demo project to train and deploy a model.
Learn how to write your own rubrics for your specific use case.
Deep dive on interpreting the comparison view.
Create datasets from your own data — captured traffic or uploaded files.
## What you just learned
* **Rubrics** define your quality bar in plain English — the LLM judge uses them to score outputs
* **Evals** run your data through multiple models and score the results, giving you a data-driven comparison
* You can re-run evals anytime — after changing the rubric, adding models, or later after [training a custom model](/get-started/train-and-deploy) to see how it compares
## Next steps
Use the same demo project to train and deploy a model.
Learn how to write your own rubrics for your specific use case.
Deep dive on interpreting the comparison view.
Create datasets from your own data — captured traffic or uploaded files.